(Further) Extending MS-BASIC (6502) – Part 3

Custom MS-BASIC Commands & HD44780 LCD Quirks
In part 2 of this topic, I covered the usage of the extended/custom commands I’d added to MS-BASIC (6502), and found a quirk with way the HD44780 handled directly setting either the cursor position or the current DDRAM (display contents) address.
This post will talk about the HD44780 “issue”, and delve into the 6502 assembly code behind my custom commands.
HD44780 LCD Driver Quirks w/ 4 x 20 LCD Displays
The HD44780 LCD Driver, which comes in several variations, can drive LCD dot-matrix displays, as character displays (w/ 8 custom-definable characters), from two lines of 16 characters up to 4 lines of 40 characters (all of the LCD displays I have with an HD44780 on board are either 2×16 or 4×20 configurations).
On my two-line displays, the lines are consecutive; when you exceed the length of the first line, output continues on the second. For my four-line displays, the lines are interleaved such that, from top to bottom, line ordering is 1, 3, 2, 4; so when you print past the end of line 1 it comes out on what on the screen is line 3.
To work around that, I usually write to a buffer in the computer’s memory that is organized linearly and have a simple function to copy the appropriate 20-byte sequences to the LCD controller, so I don’t have to think about the interleave in every interaction with the display.
But that’s not the quirk here …
No … the quirk is that it appears, at least with all of the four line HD44780-driven displays I have (from multiple sources), it is not possible to directly set the cursor position, or the DDRAM write address, past 40.
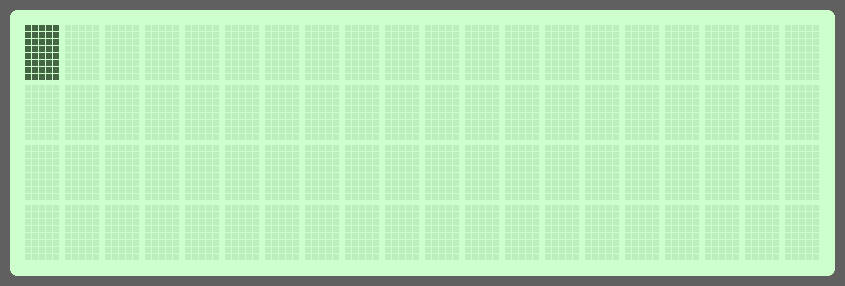
Using my LCDCURPOS function and calling it as LCDCURPOS 0, you get this (as you would expect):
Issuing LCDCURPOS 20, yields this – which is less than desirable but we understand what is happening:
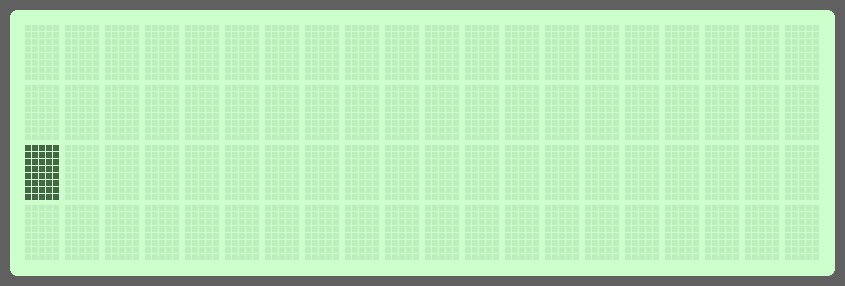
Finally, LCDCURPOS 40 puts the cursor here:
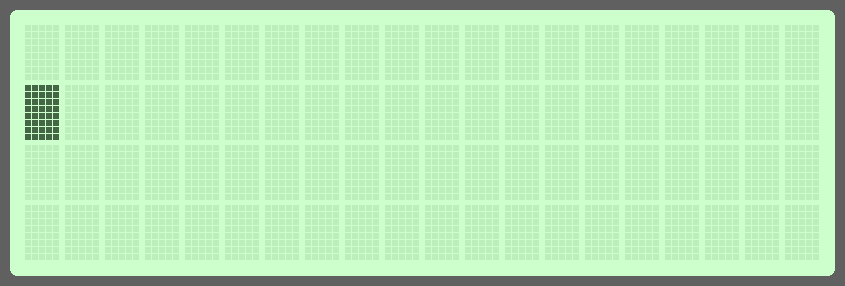
Now that is expected.
However, that’s as far as you can directly move the cursor, or set the DDRAM address.
So, only the first 40 positions (which are character position 0-19 on lines 1 and 3 respectively) can be directly addressed. If you want to move the cursor/DDRAM address to an address/position over 40 then you must do so with multiple “cursor shift” instructions (e.g., via my LCDMOVECUR function).
I don’t know if there is a way around this.
In the display output in the previous part of this series, I used a combination of direct addressing and shifting to position the cursor. It would be better (faster, more consistent) if that could all be done with direct positioning. If I can figure out a) if there is a way to do that and b) implement it, I’ll update my custom LCD command code to handle it.
Custom LCD Commands – 6502 Assembly/BASIC Extentions
Rather than repeat something that has already been well, eloquently and clearly, covered – how to add custom commands to MS-BASIC, I’m going to touch on that lightly but focus on the commands I’ve added to “my” version of basic. Refer to those links if you want to delve into the details and a walkthrough of adding new commands.
In short, adding a new custom command to MS-BASIC is a two stage affair:
- Add a “token” to “
token.s” with the name of the new command and a reference to the code that implements it. - Add code to implement the new command, labelled so that it can be invoked when the “token” is found.
We’ll add a simple command as an overview of the process, and then delve into the more interesting bits. Starting with the very basic “LCDCLS” (LCD CLear Screen) function, that simply clears the LCD’s screen and resets the cursor to position zero:
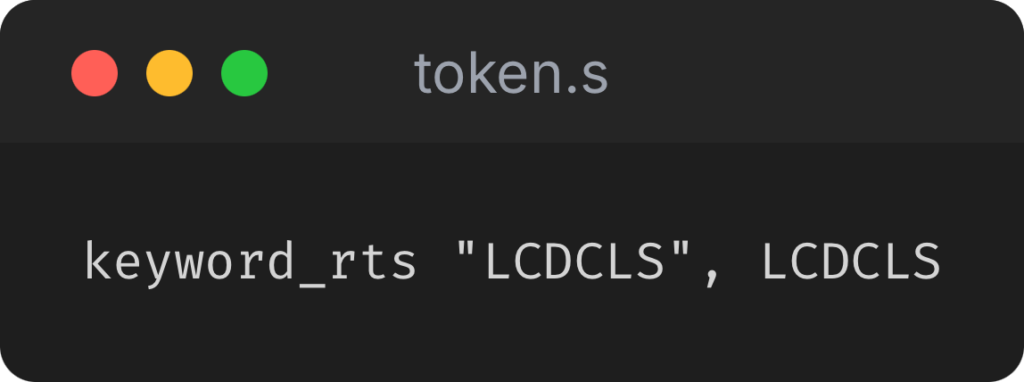
In the “token.s” file, we add a new token, designated by the keyword_rts designator. This entry defines the name of the “token” (command); i.e., "LCDCLS", followed by the name of the assembly language “label” LCDCLS which references the code that implements the actual clear-screen functionality.
Next we need to add the code to implement our custom function. I’ve put the code for LCD-related commands in the “imdlabs_lcd.s” file. The specific code for the LCDCLS command is as follows:
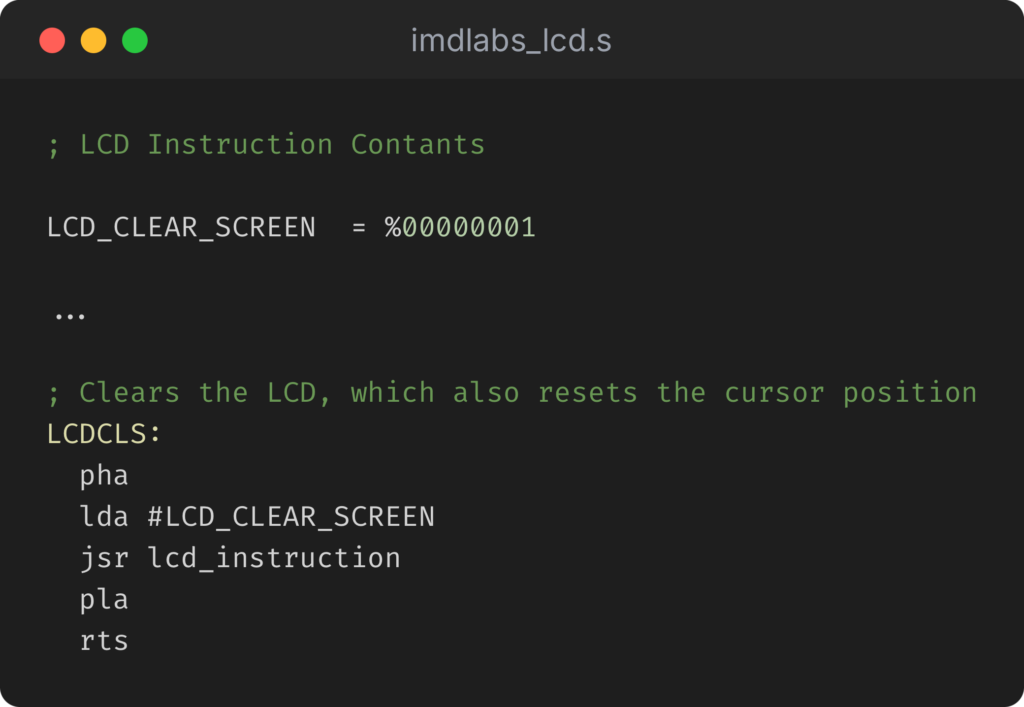
That’s an easy one, since the LCDCLS command does not take any arguments.
Ben’s videos implement several custom commands that do take arguments, including those with expression evaluation (e.g., for LCDPRINT), and I will refer you to those to see how that works.
We’ll look at a couple of my functions, in detail, all the same; starting with the LCDCURBLINK command:
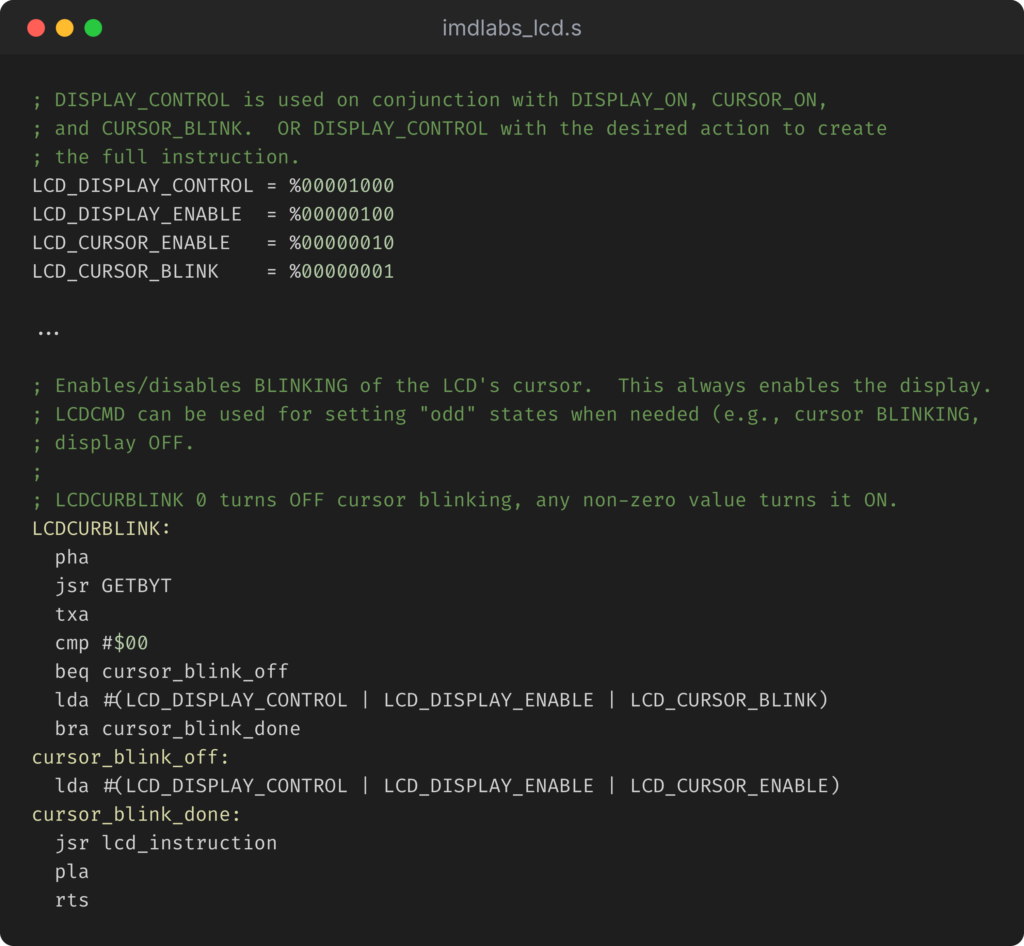
The code here is relatively simple.
It begins by calling GETBYT which retrieves the numeric argument that LCDCURBLINK was called with. If that is a zero (#$00) then we turn cursor blinking off, by combining that instruction with the LCD_DISPLAY_CONTROL bit (which says “this command is an LCD control command”) and the LCD_DISPLAY_ENABLE bit (which we enable, as it doesn’t make a lot of sense for it to be disabled if we’re turning off the cursor’s blinking). Otherwise, for any non-zero value, we set the bit that turns on cursor blinking; again enabling the display (for the same reasons).
Most of my custom commands take this sort of form; a single “unsigned” byte as an operand.
Two of my commands make use of a bit more of the core MS-BASIC’s parsing and argument resolution code, however; specifically LCDMOVECUR and LCDSCROLL.
We’re only going to look at one of them, since other than the command they issue to the LCD (moving the cursor vs. scrolling the display a specified number of character positions), they are effectively identical:
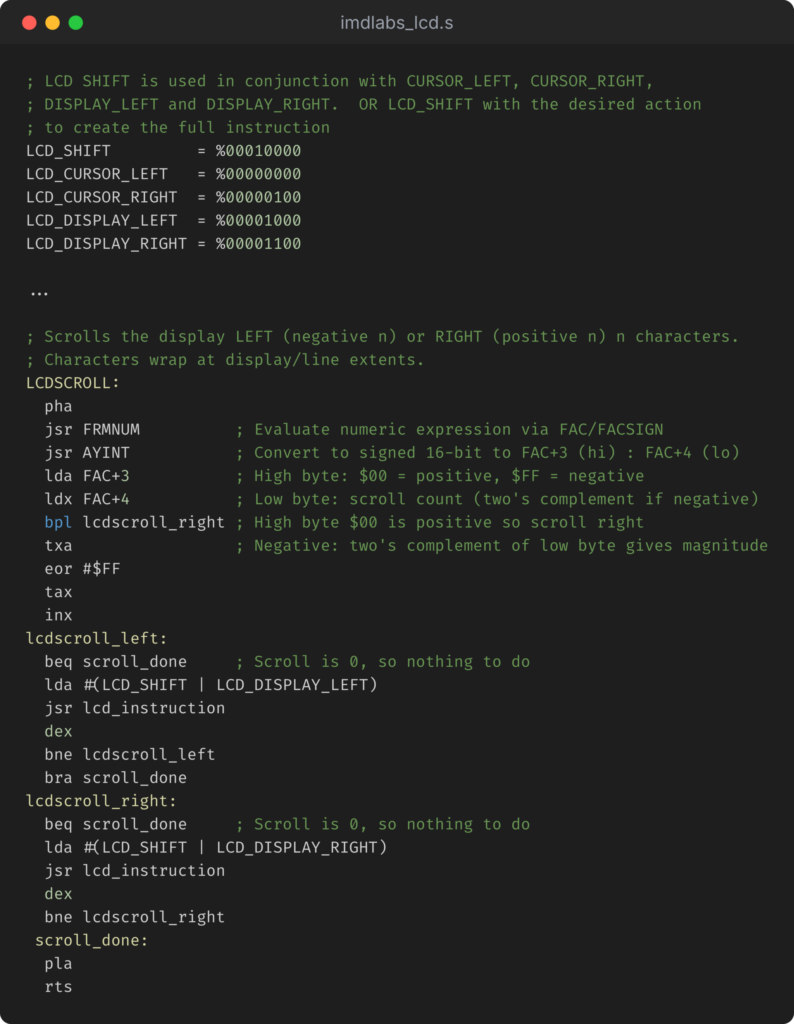
The first four operations in LCDSCROLL are the most important here, and what want to do here is retrieve the argument supplied to the LCDSCROLL call as a “signed” number. In other words, we want to know if it was positive or negative and to do so in a way that correctly interacts with the 6502s various state flags.
Here, FRMNUM in conjunction with AYINT retrieves a number (which may be a result of an expression, a literal or a reference) and then converts it to a 16-bit signed value. We only care about the bottom 8-bits (there are only 80 positions on the LCD, so don’t even need the full range of -128 to +127), so we extract those in a way that affects the processor flags. Then, if the number is positive (BPL), we scroll RIGHT and if not, we scroll LEFT, by iterating the “scroll” instruction to the LCD the number of times specified by our argument in the direction indicated by it’s sign.
Moving the cursor n spaces works in the same way.
And that’s it!
I may get into a deeper explanation of this when I start a related series of posts that will add button/joystick input capabilities, and MS-BASIC commands to support them, but expect me to cover other topics between now and then.